How to connect Apple Pay to any AI via GitHub
Sync your Apple Pay transactions directly into a GitHub repository to easily analyze your spending from Cursor, ChatGPT, or Claude.
Manual CSV exports for your financial data are dead. By syncing your Apple Pay transactions directly into a Git repository, you create a portable context vault.
The core idea: Git is the universal interface for AI.
Once your spending data is structured as Markdown in a GitHub repository, you aren't locked into a single AI app. You can ask GPT-5 in ChatGPT to categorize your spending, use Claude 4.6 to draft a budget, or open the repo right in Cursor to build custom scripts against your transaction history.
Here is how to set up an automated Apple Pay stream to your GitHub repo.
The Architecture
- GitHub Repository: The destination for your transactions.
- Lamp: The bridge that catches data and commits it cleanly to your repo.
- Apple Shortcuts: The trigger that fires when you use Apple Pay.
Step 1: Create your Context Repo
First, you need a home for your context. We recommend keeping it private.
- Sign up for a GitHub account if you don't already have one.
- Sign in to Lamp using your GitHub account.
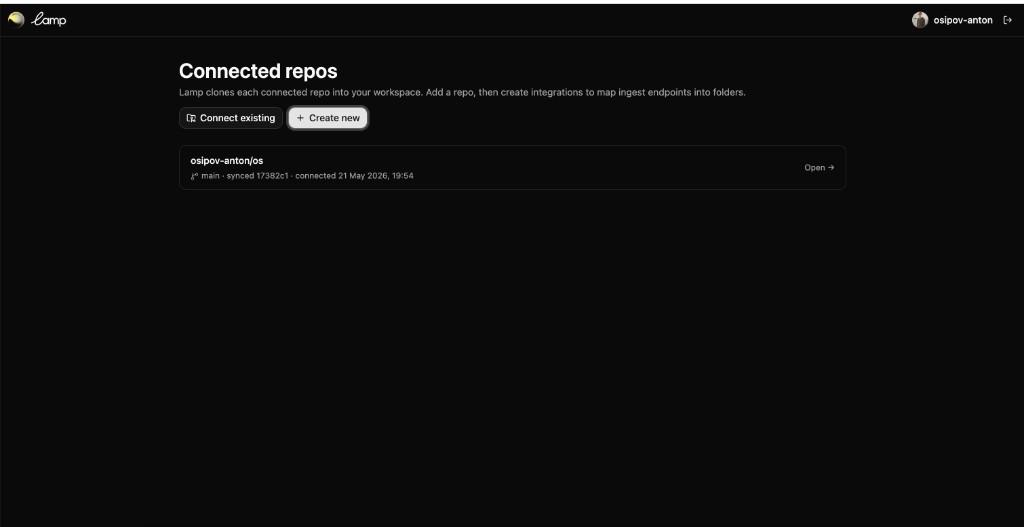
- Under Connected repos, click Create new to automatically generate a private GitHub repository for your context. Lamp will now have permission to push markdown files into this repo whenever a new event occurs.
Step 2: Connect Apple Pay to Lamp
Now we set up the actual data stream from your iPhone.
iOS has native triggers for Apple Wallet transactions via the Shortcuts app.
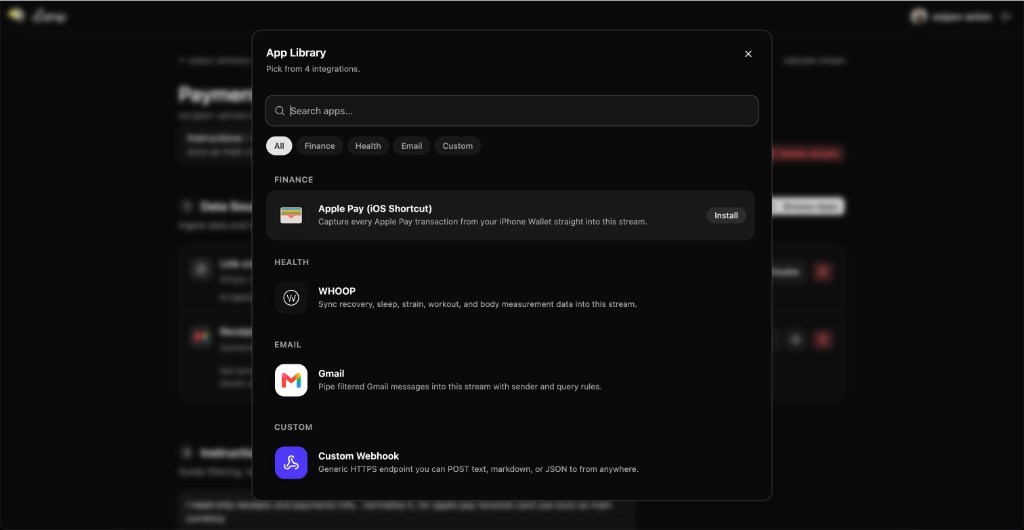
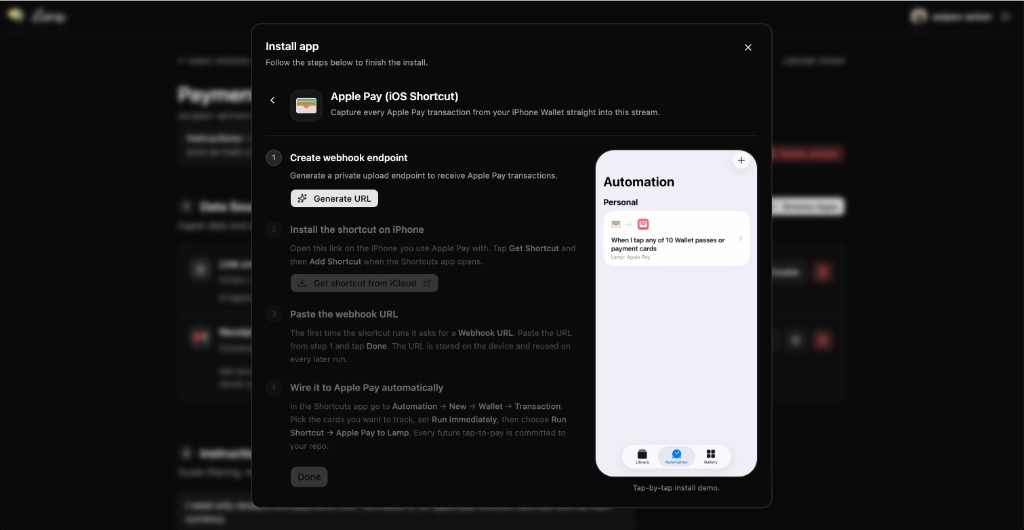
- In Lamp, go to the App Library and add Apple Pay. Lamp will generate a unique Webhook URL for you.
- Open Shortcuts on your iPhone and go to the Automation tab.
- Tap + and select Transaction (under Wallet).
- Select the cards you want to monitor, and choose Run Immediately.
- For the action, choose Get Contents of URL.
- Set the method to
POSTand paste your Lamp Webhook URL. - Map the Transaction Amount, Merchant, and Date into the JSON body (Lamp provides a one-tap shortcut to download this automatically).
Step 3: Your Git Repo is the API
Instead of dumping raw JSON, Lamp catches the webhook and commits a formatted Markdown delta to your GitHub repository. Modern models parse Markdown much faster and more reliably than raw data.
The repository structure will look like this:
lamp-context/
└── apple-pay/
    ├── _summary.md
    └── 2026/
        └── 05/
            ├── 132401-blue-bottle.md
            └── 091200-whole-foods.md
The _summary.md file maintains a running ledger. Only the delta goes to the model.
## May 2026

- **May 25**: $4.50 at *Blue Bottle Coffee* (Food & Drink)
- **May 24**: $142.00 at *Whole Foods* (Groceries)

**Monthly Total**: $146.50
Step 4: Talk to your Data anywhere
Because the context lives in GitHub, it’s instantly accessible everywhere. You can easily connect it directly to ChatGPT.
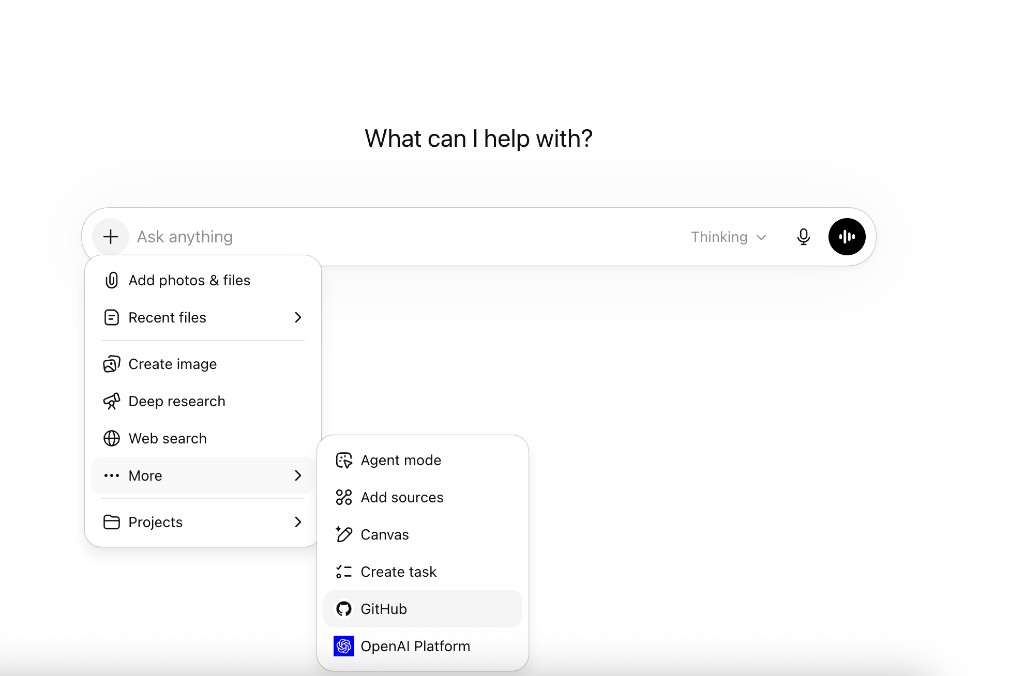
- Open ChatGPT and click the + (attachment) button.
- Select GitHub from the menu.
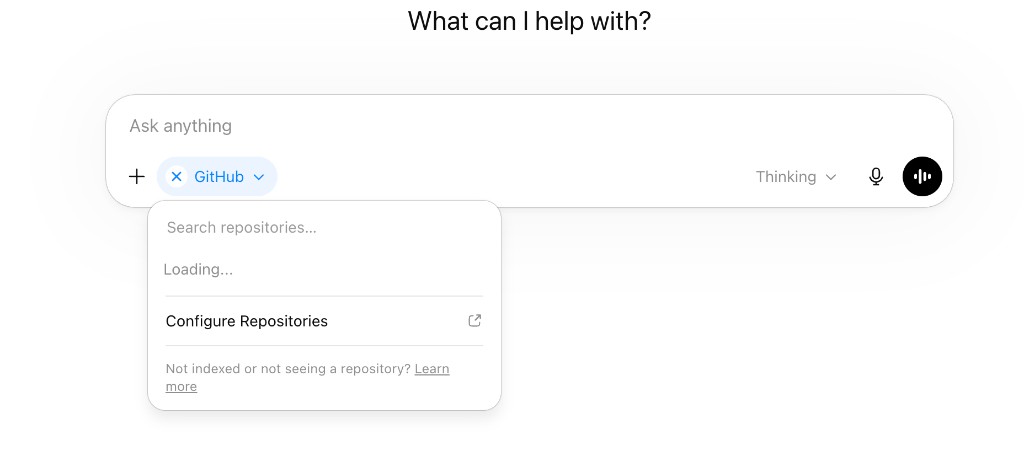
- Authorize ChatGPT to access your GitHub account if you haven't already.
- Select the
lamp-contextrepository you created earlier. - Ask your prompt: "Analyze my discretionary spending in the apple-pay summary and give me three ways to cut 15% next month."
Cursor & Copilot: You can also open the same repository directly in your IDE (like Cursor) to write scripts against your transactions or ask questions in the sidebar.
By separating your data from the AI interface, your context stays yours, ready for whichever model comes next.